Fuzzer Development 4: Snapshots, Code-Coverage, and Fuzzing
Background
This is the next installment in a series of blogposts detailing the development process of a snapshot fuzzer that aims to utilize Bochs as a target execution engine. You can find the fuzzer and code in the Lucid repository
Introduction
Previously, we left off with implementing enough of the Linux emulation logic to get Lucid running a -static-pie Bochs up to its start menu. Well, we’ve accomplished a lot in the intervening few months since then. We’ve now implemented snapshots, code-coverage feedback, and more Linux emulation logic to the point now that we can actually fuzz things! So in this post, we’ll review some of the major features that have been added to the codebase as well as some examples on how to set the fuzzer up for fuzzing.
Snapshots
One of the key benefits to the design of this fuzzer (thank you Brandon Falk) is that the entire state of the emulated/target system is completely encapsulated by Bochs. The appeal here is that if we can reliably record and reset Bochs’ state, we get target snapshots by default. In the future, this will benefit us when our targets affect device states, something like fuzzing a network service. So now our problem becomes, how do we, on Linux, perfectly record and reset the state of a process?
Well, the solution I came up with I think is very aesthetically pleasing. We need to reset the following state in Bochs:
- Any writable
PT_LOADmemory segments in the Bochs image itself - Bochs’ file-table
- Bochs’ dynamic memory, such as heap allocations
- Bochs’ extended CPU state: AVX registers, floating point unit, etc
- Bochs’ registers
Right off the bat, dynamic memory should be pretty trivial to record since we handle all calls to mmap ourselves in our fuzzer in the syscall emulation code. So we can pretty easily snapshot MMU state that way. This also applies to the file-table, since we also control all file I/O the same way. For now though, I haven’t implemented file-table snapshotting because for my fuzzing harness I’m using for development, Bochs doesn’t touch any files. I’ve resorted to marking files as dirty if we are fuzzing and they are touched and just panicking at that point for now. Later, we should be able to approach file snapshotting the same way we do the MMU.
Extended CPU state can be saved with machine instructions
But an outstanding question for me was figuring out how to record and reset the PT_LOAD segments. We can’t really track the dirtying of these pages well on Linux userland because they’ll be happening natively. There’s some common approaches to this type of problem in the fuzzing space though if you want to restore these pages differentially:
- Mark those pages as non-writable and handle write-access faults for each page. This approach will let you know if Bochs ever uses the writable page. Once you handle a fault, you can permanently mark the page as writable and then lazily reset it each fuzzing iteration.
- Use some of the utilities exposed for things like the Checkpoint Restore effort in
/procas discussed by d0c s4vage.
Ultimately though, I decided that for simplicity sake, I’d just reset all the writable segments each time.
The real problem however, is that Bochs dynamic memory allocations can be humungous because it will allocate heap memory to hold the emulated guest memory (your target system). So if you configure a guest VM with 2GB of RAM, Bochs will attempt to make a heap allocation of 2GB. This makes capturing and restoring the snapshot very expensive as a 2GB memcpy each fuzzing iteration would be very costly. So I needed a way to avoid this. Bochs does have memory access hooks however, so I could track dirtied memory in the guest this way. This might be a future implementation if we find that our current implementation becomes a performance bottleneck.
In line with my project philosophy for Lucid at the moment, which is that we’re ok sacrificing performance for either introspection or architecturual/implementation simplicity. I decided that there was a nice solution we could leverage given that we are the ones mapping Bochs into memory and not the kernel. As long as the ELF image loadable segments are ordered such that the writable segments are loaded last, this means that we start a block of memory that needs resetting. At this point you can think of the mapping like this in memory:
|-------------------------------------------------------|
|            Non-Writable ELF Segments                  |
|-------------------------------------------------------|   <-- Start of memory that we need to record and restore
|              Writable ELF Segments                    |
|-------------------------------------------------------|
This is nice for us because what we actually have now is the start of a contiguous block of writable memory that we need to restore each fuzzing iteration. The rest of the mutable memory that Bochs will affect that we care about for snapshots can be arbitrarily mapped, let’s think about it:
- Extended state save area for Bochs: Yep, we control where this is mapped, we can map this right up against the last writable ELF segment with
mmapandMAP_FIXED. Now our continguous block contains the extended state as well. - MMU Dynamic Memory (Brk, Mmap): Yep, we control this because we pre-allocate dynamic memory and then use these syscalls as basically bump allocator APIs so this is also now part of our contiguous block.
So now, we can conceptualize the entire block of memory that we need to track for snapshots as:
|-------------------------------------------------------|
|            Non-Writable ELF Segments                  |
|-------------------------------------------------------|   <-- Start of memory that we need to record and restore
|              Writable ELF Segments                    |
|-------------------------------------------------------|
|             Bochs Extended CPU State                  |
|-------------------------------------------------------|
|                Bochs MMU/Brk Pool                     |
|-------------------------------------------------------|   <-- End of memory that we need to record and restore
So why do we care about the writable memory being compact and contiguous like this? We still face the issue where the MMU/Brk pool of memory is way too large to do a giant memcpy each fuzzing iteration. Our solution must either use differential resets (ie, only reset what was dirty) or it must find a new way to do wholesale restoration since memcpy is not good enough.
Without wanting to noodle over differential resets and trying to focus on simplicity, I settled on an efficient way to use the concept of contiguous memory to our advantage for resetting the entire block without relying on memcpy. We can cache the snapshot contents in memory for the duration of the fuzzer by using Linux’s shared memory objects which are allocated with libc::shm_open. This is basically like opening a file that is backed by shared memory, so we won’t really trigger any disk reads or expensive file I/O when we read the contents for each snapshot restoration.
Next, when it’s time to restore, we can simply mmap that “file” overtop of the dirty continguous block. They will have the same size, right? And we control the location of the contiguous memory block, so this makes resetting dirty memory extremely easy! It’s literally mostly just this code:
// This function will take the saved data in the shm object and just mmap it
// overtop of the writable memory block to restore the memory contents
#[inline]
fn restore_memory_block(base: usize, length: usize, fd: i32) ->
    Result<(), LucidErr> {
    // mmap the saved memory contents overtop of the dirty contents
    let result = unsafe {
        libc::mmap(
            base as *mut libc::c_void,
            length,
            libc::PROT_READ | libc::PROT_WRITE,
            libc::MAP_PRIVATE | libc::MAP_FIXED,
            fd,
            0
        )
    };

    if result == libc::MAP_FAILED || result != base as *mut libc::c_void {
        return Err(LucidErr::from("Failed to mmap restore snapshot"));
    }

    Ok(())
}
You just need the file descriptor for the shared memory object and you can perform the restoration for the memory contents. On my relatively old CPU and inside a VMWare VM, I was able to reset this memory block roughly 18k times per second which is definitely fast enough for a fuzzer like Lucid that will most certainly bottleneck on target emulation code. That’s not to say that we won’t have issues in the future however. A lot of kernel time with this approach is spent destroying the pages we mmap overtop of if they are no longer needed and this may be a bottleneck if we scale our fuzzing up in the future. Time will tell. For now, I love how simple and easy the approach is. Shoutout to Dominik Maier and the rest of the fuzzing discord for helping me workshop the idea.
Second most important benefit behind the simplicity, is that the performance is relatively constant regardless of block-size. We get to take advantage of several efficient memory management optimizations of the Linux kernel and we don’t have an issue with 2GB memcpy operations slowing us down. With my current setup of having 64MB of guest memory allocated, this shmem + mmap approach was roughly 10x faster than a giant memcpy. We go from spending 13% of CPU time in the snapshot restoration code to 96% of the time with memcpy. So it works well for us right now.
Some other small things about snapshot restoration, we can “clone” an existing MMU, ie the one we saved during snapshot recording, to the current MMU (dirty) with something like this very trivially:
// Copy the contents of an existing MMU, used for snapshot restore
    pub fn restore(&mut self, mmu: &Mmu) {
        self.map_base = mmu.map_base;
        self.map_length = mmu.map_length;
        self.brk_base = mmu.brk_base;
        self.brk_size = mmu.brk_size;
        self.curr_brk = mmu.curr_brk;
        self.mmap_base = mmu.mmap_base;
        self.mmap_size = mmu.mmap_size;
        self.curr_mmap = mmu.curr_mmap;
        self.next_mmap = mmu.next_mmap;
    }
We also have the GPRs of Bochs to worry about, but luckily for us, those are saved already when Bochs context switches into the Lucid in order to take the snapshot.
Triggering Snapshot Operations
The next thing we need to do is determine how to invoke snapshot logic from the harness running in the guest. I decided to piggyback off of Bochs’ approach and leverage specific types of NOP instruction sequences that are unlikely to exist in your target (collisions are not likely). Bochs uses these types of NOPs as magic breakpoints for when you’re using Bochs compiled in debugger mode. They are as follows:
66:87C9  | xchg cx,cx  | 1000011111 001 001 -> 1
66:87D2  | xchg dx,dx  | 1000011111 010 010 -> 2
66:87DB  | xchg bx,bx  | 1000011111 011 011 -> 3
66:87E4  | xchg sp,sp  | 1000011111 100 100 -> 4
66:87ED  | xchg bp,bp  | 1000011111 101 101 -> 5
66:87F6  | xchg si,si  | 1000011111 110 110 -> 6
66:87FF  | xchg di,di  | 1000011111 111 111 -> 7
This code is located in bochs/cpu/data_xfer16.cc. The bxInstruction_c struct has fields for this type of operation which track both the src register and the dst register. If they are the same, it checks them against their binary representation in the instruction encoding. For example xchg dx, dx would mean that i->src() and i->dst() both equal 2.
So in this instruction handler, we already have an example of how to implement logic to get Bochs to recognize instructions in the guest and do something.
We also have two types of snapshots really. One is when we use a regular “vanilla” version of Bochs with a GUI and what we’re aiming to do is “snapshot” the Bochs state to disk where we want to start fuzzing from. This is distinct from the snapshot that the fuzzer conceives of. So for instance, if you’ve built a harness like I have, you would want to boot up your system with Bochs in the GUI, get a shell, and finally run your harness. Your harness can then trigger one of these magic breakpoints to get Bochs to then save its state to disk, and this is what I’ve done.
Bochs has the ability to save its state to disk in the event that a user uses the “Suspend” feature, like pausing a VM. Bochs can then resume that suspended VM later in the future, great feature obviously. We can take advantage by just copy-pasta-ing that code right over to the instruction handler from where it normally lives (somewhere in the GUI simulation interface code). I think all I had to do was add an additional include to data_xfer16.cc and then hack in my logic as follows:
#if BX_SNAPSHOT
  // Check for take snapshot instruction `xchg dx, dx`
  if ((i->src() == i->dst()) && (i->src() == 2)) {
    BX_COMMIT_INSTRUCTION(i);
    if (BX_CPU_THIS_PTR async_event)
      return;
    ++i;
    char save_dir[] = "/tmp/lucid_snapshot";
    mkdir(save_dir, 0777);
    printf("Saving Lucid snapshot to '%s'...\n", save_dir);
    if (SIM->save_state(save_dir)) {
      printf("Successfully saved snapshot\n");
      sleep(2);
      exit(0);
    }
    else {
      printf("Failed to save snapshot\n");
    }
    BX_EXECUTE_INSTRUCTION(i);
  }
#endif
So if we build a vanilla Bochs with a GUI and define BX_SNAPSHOT during the build process, we should be able to make Bochs save its state to disk when it encounters a xchg dx, dx instruction as if the end-user has pressed suspend at the perfect moment down to the instruction in our harness.
Now in the fuzzer, we will tell our Bochs to resume the saved-to-disk state and right as its about to emulate its first instruction in the CPU-loop, break back into the fuzzer and take the sort of snapshot the fuzzer is going to use that we discussed in the previous section. This was done by hacking in some code in cpu/cpu.cc as follows:
jmp_buf BX_CPU_C::jmp_buf_env;

void BX_CPU_C::cpu_loop(void)
{
#if BX_SUPPORT_HANDLERS_CHAINING_SPEEDUPS
  volatile Bit8u stack_anchor = 0;

  BX_CPU_THIS_PTR cpuloop_stack_anchor = &stack_anchor;
#endif

#if BX_DEBUGGER
  BX_CPU_THIS_PTR break_point = 0;
  BX_CPU_THIS_PTR magic_break = 0;
  BX_CPU_THIS_PTR stop_reason = STOP_NO_REASON;
#endif

// Place the Lucid snapshot taking code here above potential long jump returns
#if BX_LUCID
  lucid_take_snapshot();
#endif

  if (setjmp(BX_CPU_THIS_PTR jmp_buf_env)) {
    // can get here only from exception function or VMEXIT
    BX_CPU_THIS_PTR icount++;
    BX_SYNC_TIME_IF_SINGLE_PROCESSOR(0);
#if BX_DEBUGGER || BX_GDBSTUB
    if (dbg_instruction_epilog()) return;
#endif
#if BX_GDBSTUB
    if (bx_dbg.gdbstub_enabled) return;
#endif
  }
You can see that if we have built Bochs for the fuzzer (with BX_LUCID defined), we’ll call the take snapshot function before we start emulating instructions or even return from an exception via longjmp or similar logic. The logic of the take snapshot code is very simple, we just set some variables in the global execution context to let Lucid know why we exited the VM and what it should do about it:
// Call into Lucid to take snapshot of current Bochs state
__attribute__((optimize(0))) void lucid_take_snapshot(void) {
    if (!g_lucid_ctx)
        return;

    // Set execution mode to Bochs
    g_lucid_ctx->mode = BOCHS;

    // Set the exit reason
    g_lucid_ctx->exit_reason = TAKE_SNAPSHOT;

    // Inline assembly to switch context back to fuzzer
    __asm__ (
        "push %%r15\n\t"          // Save r15 register
        "mov %0, %%r15\n\t"       // Move context pointer into r15
        "call *(%%r15)\n\t"       // Call context_switch
        "pop %%r15"               // Restore r15 register
        :                         // No output
        : "r" (g_lucid_ctx)       // Input
        : "memory"                // Clobber
    );

    return;
}
Now Lucid can save this state as a snapshot and reset to it after each fuzzing iteration, all by virtue of just including a simple xchg dx, dx instruction in your fuzzing harness, very cool stuff imo! At the end of a fuzzcase, when we’ve reset the snapshot state and we want to start executing Bochs again from the snapshot state, we just call this function via a context switch which ends with a simple ret instruction. This will behave as if Bochs is just returning from calling lucid_take_snapshot as a normal function:
// Restore Bochs' state from the snapshot
fn restore_bochs_execution(contextp: *mut LucidContext) {
    // Set the mode to Bochs
    let context = LucidContext::from_ptr_mut(contextp);
    context.mode = ExecMode::Bochs;

    // Get the pointer to the snapshot regs
    let snap_regsp = context.snapshot_regs_ptr();

    // Restore the extended state
    context.restore_xstate();

    // Move that pointer into R14 and restore our GPRs
    unsafe {
        asm!(
            "mov r14, {0}",
            "mov rax, [r14 + 0x0]",
            "mov rbx, [r14 + 0x8]",
            "mov rcx, [r14 + 0x10]",
            "mov rdx, [r14 + 0x18]",
            "mov rsi, [r14 + 0x20]",
            "mov rdi, [r14 + 0x28]",
            "mov rbp, [r14 + 0x30]",
            "mov rsp, [r14 + 0x38]",
            "mov r8, [r14 + 0x40]",
            "mov r9, [r14 + 0x48]",
            "mov r10, [r14 + 0x50]",
            "mov r11, [r14 + 0x58]",
            "mov r12, [r14 + 0x60]",
            "mov r13, [r14 + 0x68]",
            "mov r15, [r14 + 0x78]",
            "mov r14, [r14 + 0x70]",
            "sub rsp, 0x8",             // Recover saved CPU flags
            "popfq",
            "ret",
            in(reg) snap_regsp,
        );
    }
}
That’s pretty much it for snapshots I think, curious to see how they’ll perform in the future, but they’re doing the trick now.
Code Coverage Feedback
After snapshots were settled, I moved on to implementing code coverage feedback. At first I was kind of paralyzed by the options since we have access to everything via Bochs. We know every single PC that is executed during a fuzzing iteration so really we can do whatever we want. I ended up implementing something pretty close to what old-school AFL did which tracks code coverage at two levels:
- Edge pairs: These are addresses where a branch takes place. For example if the instruction at
0x1337is ajmp 0x13371337, then we would have an edge pair of0x1337and0x13371337. This combination is what we’re keeping track of. Basically what is the current PC and what PC are we branching to. This also applies when we don’t take a branch, because we skip over the branching instruction and land on a new instruction instead which in its own way is a branch. - Edge pair frequency: We also want to know how often these edge-pairs are accessed during a fuzzing iteration. So not only binary fidelity of “edge pair seen/edge pair not seen”, we also want frequency. We want to differentiate inputs that hit the edge pair 100x vs one that hits it 100000x during a fuzzing iteration. This added fidelity should provide us more valuable feedback vs. just rough data of edges hit vs not hit.
With these two levels of introspection in mind, we had to choose a way to implement this. Luckily, we can compile Bochs with instrumentation that it exposes stubs for in instrument/stubs/instrument.cc. And some of the stubs are particularly useful for us because they instrument branching instructions. So if you compile Bochs with BX_INSTRUMENTATION defined, you get those stubs compiled into the instruction handlers that handle branching instructions in the guest. They have a prototype that logs the current PC and the destination PC. I had to make some changes to the stub signature for the conditional branch not taken instrumentation because it did not track what PC would be taken and we need that information to form our edge-pair. Here is what the stub logic looked like before, and then after I modified it:
void bx_instr_cnear_branch_taken(unsigned cpu, bx_address branch_eip, bx_address new_eip) {}
void bx_instr_cnear_branch_not_taken(unsigned cpu, bx_address branch_eip) {}
And I changed them to:
void bx_instr_cnear_branch_taken(unsigned cpu, bx_address branch_eip, bx_address new_eip) {}
void bx_instr_cnear_branch_not_taken(unsigned cpu, bx_address branch_eip, bx_address new_eip) {}
So I had to go through and change all the macro invocations in the instruction handlers to calculate a new taken PC for bx_instr_cnear_branch_not_taken, which was annoying but as far as hacking on someone else’s project goes, very easy. Here is an example from the Bochs patch file of what I changed at the call-site, you can see that I had to calculate a new variable bx_address taken in order to get a pair:
-  BX_INSTR_CNEAR_BRANCH_NOT_TAKEN(BX_CPU_ID, PREV_RIP);
+  bx_address taken = PREV_RIP + i->ilen();
+  BX_INSTR_CNEAR_BRANCH_NOT_TAKEN(BX_CPU_ID, PREV_RIP, taken);
Now we know the current PC and the PC we’re branching to in the target each time, its time to put that information to use. On the Lucid side in Rust, I have a coverage map implementation like this:
const COVERAGE_MAP_SIZE: usize = 65536;

#[derive(Clone)]
#[repr(C)]
pub struct CoverageMap {
    pub curr_map: Vec<u8>,          // The hit count map updated by Bochs
    history_map: Vec<u8>,           // The map from the previous run
    curr_map_addr: *const u8,       // Address of the curr_map used by Bochs
}
It’s a long array of u8 values where each index represents an edge-pair that we’ve hit. We pass the address of that array to Bochs so that it can set the value in the array for the edge-pair it’s currently tracking. So Bochs will encounter a branching instruction, it will have a current PC and a PC its branching to, it’ll formulate a meaningful value for it and translate that value into an index in the coverage map array of u8 values. At that index, it will increment the u8 value. This process is done by hashing the two edge addresses and then doing a logical AND operation so that we mask off the bits that wouldn’t be an index value in the coverage map. This means we could have collisions, we may have an edge-pair that yields the same hash as a second distinct edge-pair. But this is just a drawback associated with this strategy that we’ll have to accept. There are other ways of having non-colliding edge-pair tracking but it would require hash-lookups each time we encounter a branching instruction. This may be expensive, but given that we have such a slow emulator running our target code, we may eventually switch to this paradigm, we’ll see.
For the hashing algorithm I chose to use dbj2_hash which is a weird little hashing algorithm that is fast and supposedly offers some pretty good distribution (low collision rate). So all in all we do the following:
- Encounter an edge-pair via an instrumented branching instruction
- Hash the two edge addresses using
dbj2_hash - Shorten the hash value so that it cannot be longer than
coverage_map.len() - Increase the
u8value atcoverage_map[hash]
This is how we update the map from Bochs:
static inline uint32_t dbj2_hash(uint64_t src, uint64_t dst) {
    if (!g_lucid_ctx)
        return 0;

    uint32_t hash = 5381;
    hash = ((hash << 5) + hash) + (uint32_t)(src);
    hash = ((hash << 5) + hash) + (uint32_t)(dst);
    return hash & (g_lucid_ctx->coverage_map_size - 1);
}

static inline void update_coverage_map(uint64_t hash) {
    // Get the address of the coverage map
    if (!g_lucid_ctx)
        return;

    uint8_t *map_addr = g_lucid_ctx->coverage_map_addr;

    // Mark this as hit
    map_addr[hash]++;

    // If it's been rolled-over to zero, make it one
    if (map_addr[hash] == 0) {
        map_addr[hash] = 1;
    }
}

void bx_instr_cnear_branch_taken(unsigned cpu, bx_address branch_eip, bx_address new_eip) {
    uint64_t hash = dbj2_hash(branch_eip, new_eip);
    update_coverage_map(hash);
    //printf("CNEAR TAKEN: (0x%lx, 0x%lx) Hash: 0x%lx\n", branch_eip, new_eip, hash);
}
void bx_instr_cnear_branch_not_taken(unsigned cpu, bx_address branch_eip, bx_address new_eip) {
    uint64_t hash = dbj2_hash(branch_eip, new_eip);
    update_coverage_map(hash);
    //printf("CNEAR NOT TAKEN: (0x%lx, 0x%lx) Hash: 0x%lx\n", branch_eip, new_eip, hash);
}
Now we have this array of u8 values on the Lucid side to evaluate after each fuzzing iteration. On the Lucid side we need to do a few things:
- We need to categorize each
u8into what’s called abucket, which is just a range of hits for the edge-pair. For example, hitting the edge-pair 100 times is not much different from hitting the same edge-pair 101 times, so we logicallybucketthose two types of coverage data together. They are the same as far as we’re concerned. What we really want are drastic differences. So if we see an edge-pair 1 time vs 1000 times, we want to know that difference. I stole the bucketing logic straight from AFL++ which has empirically tested the best bucketing strategies to get the most valuable feedback for most targets. - After we transform the raw hit counts to bucket values instead, we’ll want to see if we see any new bucket counts that we haven’t seen before. This means we’ll need to keep a copy of the coverage map around at all times as well. We will walk both of them together. If the current coverage map now has a higher
u8value for an edge-pair than the old coverage map (historical one that tracks all time highs for each index), then we have new coverage results we’re interested in!
You can see that logic here:
    // Roughly sort ranges of hitcounts into buckets, based on AFL++ logic
    #[inline(always)]
    fn bucket(hitcount: u8) -> u8 {
        match hitcount {
            0 => 0,
            1 => 1,
            2 => 2,
            3 => 4,
            4..=7 => 8,
            8..=15 => 16,
            16..=31 => 32,
            32..=127 => 64,
            128..=255 => 128,
        }
    }

    // Walk the coverage map in tandem with the history map looking for new
    // bucket thresholds for hitcounts or brand new coverage
    //
    // Note: normally I like to write things as naively as possible, but we're
    // using chained iterator BS because the compiler spits out faster code
    pub fn update(&mut self) -> (bool, usize) {
        let mut new_coverage = false;
        let mut edge_count = 0;

        // Iterate over the current map that was updated by Bochs during fc
        self.curr_map.iter_mut()

            // Use zip to add history map to the iterator, now we get tuple back
            .zip(self.history_map.iter_mut())

            // For the tuple pair
            .for_each(|(curr, hist)| {

                // If we got a hitcount of at least 1
                if *curr > 0 {

                    // Convert hitcount into bucket count
                    let bucket = CoverageMap::bucket(*curr);

                    // If the old record for this edge pair is lower, update
                    if *hist < bucket {
                        *hist = bucket;
                        new_coverage = true;
                    }

                    // Zero out the current map for next fuzzing iteration
                    *curr = 0;
                }
            });

        // If we have new coverage, take the time to walk the map again and
        // count the number of edges we've hit
        if new_coverage {
            self.history_map.iter().for_each(|&hist| {
                if hist > 0 {
                    edge_count += 1;
                }
            });
        }

        (new_coverage, edge_count)
    }
That’s pretty much it for code coverage feedback, Bochs updates the map from instrumentation hooks in branching instruction handlers, and then Lucid analyzes the results at the end of a fuzzing iteration and clears the map for the next run. Stolen directly from the AFL universe.
Environment/Target Setup
Getting a target setup for a full-system snapshot fuzzer is always going to be a pain. It is going to be so specific to your needs and having a generic way to do this type of thing does not exist. It’s essentially the problem of harnessing which remains unsolved generically. This is where all of the labor is for the end-user of a fuzzer. This is also where all the fun is though, lobotimizing your target so that it can be fuzzed is some of the funnest hacking I’ve ever done.
For Lucid, we need something Bochs can understand. Turns out it can run and boot iso files pretty easily, and since I’m mostly interested in fuzzing Linux kernel stuff, I decided to make a custom kernel and compile it into an iso to fuzz with Lucid. This worked extremely well and was very easy once I got the hang of creating iso files. As for a mature workflow, I think with this type of thing specifically, I would try to do the following:
- Iteratively develop your harness/setup in QEMU-system since its faster, more mature, easier to use etc
- Once completely done with your harness/setup, compile that setup to an
.isoand run it in Lucid for fuzzing
That’s at least what I’ll be doing for Linux kernel stuff.
I developed a fun little toy syscall to fuzz as follows:
// Crash the kernel
void __crash(void)
{
	asm volatile("xchgw %sp, %sp");
	*(int *)0 = 0;
}

// Check to see if the input matches our criteria
void inspect_input(char *input, size_t data_len) {
	// Make sure we have enough data
	if (data_len < 6)
		return;

	if (input[0] == 'f')
		if (input[1] == 'u')
			if (input[2] == 'z')
				if (input[3] == 'z')
					if (input[4] == 'm')
						if (input[5] == 'e')
							__crash();

	return;
}

SYSCALL_DEFINE2(fuzzme, void __user *, data, size_t, data_len)
{
	char kernel_copy[1024] = { 0 };
	printk("Inside fuzzme syscall\n");

	// Make sure we don't overflow stack buffer
	if (data_len > 1024)
		data_len = 1024;

	// Copy the user data over
	if (copy_from_user(kernel_copy, data, data_len))
	{
		return -EFAULT;
	}

	// Inspect contents to try and crash
	inspect_input(kernel_copy, data_len);

	return 0;
}
I just added a new syscall to the kernel called fuzzme that has a syscall number of 451 and then I just compile a harness and stuff that in /usr/bin/harness on the disk of the iso. I didn’t try to generically find a way to plumb up crashes to Lucid yet, I just put the special NOP instruction for signaling a crash instead in the __crash function. But with things like KASAN, I’m sure there will be some chokepoint I can use in the future as a catch all for crashes. Weirdly detecting crashes is not a trivial problem from the Bochs host level like it is when the kernel sends your program a signal (obviously some kernel oops will signal your harness if you build it this way).
The harness was simple and was just the following:
#include <stdio.h>
#include <sys/syscall.h>
#include <string.h>

#define __NR_fuzzme 451

#define LUCID_SIGNATURE { 0x13, 0x37, 0x13, 0x37, 0x13, 0x37, 0x13, 0x37, \
                          0x13, 0x38, 0x13, 0x38, 0x13, 0x38, 0x13, 0x38 }

#define MAX_INPUT_SIZE 1024UL

struct fuzz_input {
    unsigned char signature[16];
    size_t input_len;
    char input[MAX_INPUT_SIZE];
};

int main(int argc, char *argv[])
{
    struct fuzz_input fi = {
        .signature = LUCID_SIGNATURE,
        .input_len = 8,
    };
    memset(&fi.input[0], 'A', 8);

    // Create snapshot
    asm volatile("xchgw %dx, %dx");

    // Call syscall we're fuzzing
    long ret = syscall(__NR_fuzzme, fi.input, *(size_t *)&fi.input_len);

    // Restore snapshot
    asm volatile("xchgw %bx, %bx");

    if (ret != 0) {
        perror("Syscall failed");
    } else {
        printf("Syscall success\n");
    }

    return 0;
}
I create a 128-bit signature value that Lucid can scan for in Bochs heap memory and learn the dimensions of the fuzzing input. Once I find the signature, I can insert inputs into Bochs from Lucid. This is also probably doable by using some Bochs logic to translate guest linear addresses to the physical memory in the host Bochs and then plumb those values up via GPR during the snapshot, but I haven’t done a lot of work there yet. This way also seems pretty generic? I’m not sure what people will prefer, we’ll see.
You can see the special NOP instructions for taking a snapshot and then restoring a snapshot. So we really only fuzz the syscall portion of the harness.
I basically followed this tutorial for building an iso with BusyBox: https://medium.com/@ThyCrow/compiling-the-linux-kernel-and-creating-a-bootable-iso-from-it-6afb8d23ba22. I compiled the harness statically and then copied that into /usr/bin/harness and then I can run that from vanilla Bochs with a GUI to save Bochs state to disk at the snapshot point we want to fuzz from.
I added my custom syscall to the Linux kernel at kernel/sys.c at the bottom of the source file for kernel version 6.0.1, and I added the harness to /usr/bin/harness in the initramfs from the tutorial. My file hierarchy for the iso when I went to create it is:
iso_files
  - boot
    - bzImage
    - initramfs.cpio.gz
    - grub
      - grub.cfg
bzImage is the compiled kernel image. initramfs.cpio.gz is the compressed initramfs file system we want in the virtual machine, you can create that by navigating to its root and doing something like find . | cpio -o -H newc | gzip > /path/to/iso_files/boot/initramfs.cpio.gz.
The contents of my grub.cfg file looked like this:
set default=0
set timeout=10
menuentry 'Lucid Linux' --class os {
    insmod gzio
    insmod part_msdos
    linux /boot/bzImage
    initrd /boot/initramfs.cpio.gz
}
Pointing grub-mkrescue at the iso_files dir will have it spit out the iso we want to run in Bochs: grub-mkrescue -o lucid_linux.iso iso_files/.
Here is what everything looks like from start to finish when you run the environment:
devbox:~/git_bochs/Bochs/bochs]$ /tmp/gui_bochs -f bochsrc_gui.txt
========================================================================
                     Bochs x86 Emulator 2.8.devel
             Built from GitHub snapshot after release 2.8
                  Compiled on Jun 21 2024 at 14:42:29
========================================================================
00000000000i[      ] BXSHARE not set. using compile time default '/usr/local/share/bochs'
00000000000i[      ] reading configuration from bochsrc_gui.txt
------------------------------
Bochs Configuration: Main Menu
------------------------------

This is the Bochs Configuration Interface, where you can describe the
machine that you want to simulate.  Bochs has already searched for a
configuration file (typically called bochsrc.txt) and loaded it if it
could be found.  When you are satisfied with the configuration, go
ahead and start the simulation.

You can also start bochs with the -q option to skip these menus.

1. Restore factory default configuration
2. Read options from...
3. Edit options
4. Save options to...
5. Restore the Bochs state from...
6. Begin simulation
7. Quit now

Please choose one: [6]
We’ll want to just being simulation, so enter 6 here. When we do, we should eventually be booted into this screen for GRUB to choose what to boot into, we just select Lucid Linux:
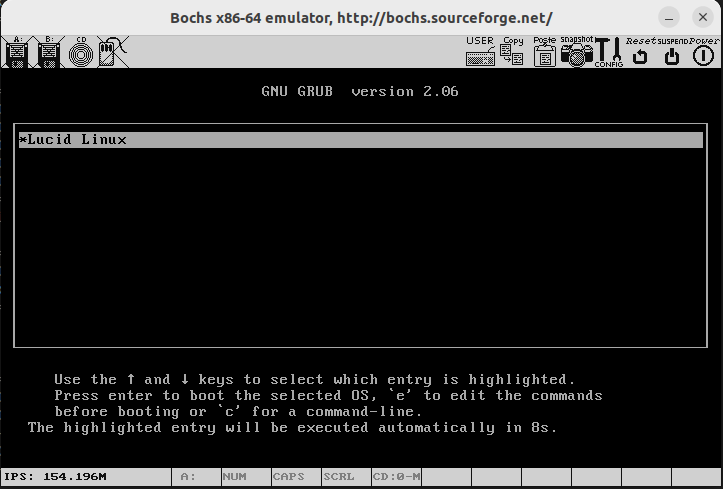
Once we boot and get our shell, I just have to call harness from the command line since its automatically in my $PATH and save the Bochs state to disk!
Please choose one: [6] 6
00000000000i[      ] installing sdl2 module as the Bochs GUI
00000000000i[SDL2  ] maximum host resolution: x=1704 y=1439
00000000000i[      ] using log file bochsout.txt
Saving Lucid snapshot to '/tmp/lucid_snapshot'...
Successfully saved snapshot
Now, /tmp/lucid_snapshot has all of the information to resume this saved Bochs state inside Lucid’s Bochs. We just need to go and comment out the display library line from /tmp/lucid_snapshot/config as follows:
# configuration file generated by Bochs
plugin_ctrl: unmapped=true, biosdev=true, speaker=true, extfpuirq=true, parallel=true, serial=true, e1000=false
config_interface: textconfig
#display_library: sdl2
Next, we just have to run Lucid and give it the right Bochs arguments to resume that saved state from disk:
./lucid --input-signature 0x13371337133713371338133813381338 --verbose --bochs-image /tmp/lucid_bochs --bochs-args -f /home/h0mbre/git_bochs/Bochs/bochs/bochsrc_nogui.txt -q -r /tmp/lucid_snapshot
Here are the contents of those configuration files, both for the GUI vanilla Bochs, and the one we pass here to Lucid’s Bochs, the only difference is the commented out display library line:
romimage: file="/home/h0mbre/git_bochs/Bochs/bochs/bios/BIOS-bochs-latest"
vgaromimage: file="/home/h0mbre/git_bochs/Bochs/bochs/bios/VGABIOS-lgpl-latest"
pci: enabled=1, chipset=i440fx
boot: cdrom
ata0-master: type=cdrom, path="/home/h0mbre/custom_linux/lucid_linux.iso", status=inserted
log: bochsout.txt
clock: sync=realtime, time0=local
cpu: model=corei7_skylake_x
cpu: count=1, ips=750000000, reset_on_triple_fault=1, ignore_bad_msrs=1
cpu: cpuid_limit_winnt=0
memory: guest=64, host=64
#display_library: sdl2
Really not much to it, you just have to put the iso in the right device and say that it’s inserted and you should be good to go. We can actually fuzz stuff now!
Conclusion
Now that its conceivable we can fuzz stuff with this now, there is a lot of small changes that need to take place that I will work on in the future:
- Mutator: Right now there is a stand-in toy mutator for demo purposes, and I think we actually won’t do any mutation stuff on this blog. I’ll probably add Brandon’s basic mutator to the fuzzer as the default, but I think I can make it bring your input generator fairly easily with Rust traits, we’ll see on that. Maybe that will be a blogpost who knows.
- Corpus mangagement: Right now there is none! That should be fairly trivial to do however, not worth a blogpost
- Parallelization: This will be a fun blogpost I think, I’d like the fuzzer to be easily parallelizable and maybe distributed across nodes. I’d like to get this thing fuzzing on my servers I bought a few years ago and never used lol.
- Redqueen: We have such easy access to the relevant instructions that we have to implement this feature, it’s a huge boost to efficiency.
- LibAFL Integration: This will definitely be a blogpost, we want this to eventually serve as the execution engine for LibAFL.
Maybe in the next blogpost, we’ll try to fuzz a real target and find an N-Day? That would be fun if the input generation aspect isn’t too much labor. Let me know what you want to see, until next time.